
Configuring Default Options and Advanced Settings

Materia X2 was developed and designed optimally so that users can use it easily. Installing and Customizing the Materia X2 theme does not require any special knowledge of HTML, CSS or JavaScript.
Table of Contents
Forbidden Settings
Although you can customize the Materia X2 theme flexibly. However, there are settings that are forbidden to change. The setting is Background image.
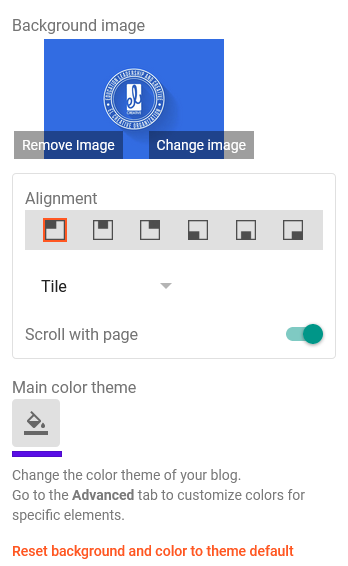
Initially, this setting is useful for changing Meta Image for Index page as well as for changing Key color (Browser Tab/Navbar Color). Since we still haven't figured out the best way to set it up, we hope you haven't changed anything in it.
Default Options
There's a Default setting that you don't really need to touch, but it's important and you can still customize it. Here are each one:
Viewport Pinch Zooming
This feature is useful for when the user wants to zoom in on a page on a mobile device or other touch screen device by pinch-zooming the screen, allowing you to zoom in and out. This functionality is mostly needed to provide an application experience on a web page.
By default, this feature is enabled. If it is disabled, it will cause problems for users with low vision who rely on screen magnification to properly see the contents of a web page.
But if you want to customize it, you can follow these steps:
- Go to Blogger Dashboard, select the Theme menu.
- Click the CUSTOMIZE button.
- Click Advanced Dropdown, click Default Options Dropdown.
- Look for the Slider setting named Viewport Pinch Zooming (Disable | Enable), drag the slider right or left. Here is the explanation:
- 1px: Disable - Pinch Zooming will be disabled.
- 2px: Enable - Pinch Zooming will be enabled.
- Click the Save button (diskette icon) in the lower right corner.
Main Section Max Width
This setting is useful for setting the width of the main section (Section in the middle).
Please note that if you are using a Desktop screen with a resolution below 1366px, then you will not see any changes.
If you want to customize it, you can follow these steps:
- Go to Blogger Dashboard, select the Theme menu.
- Click the CUSTOMIZE button.
- Click Advanced Dropdown, click Default Options Dropdown.
- Look for the Option named Main Section Max Width, drag the slider right or left until you find the width you want.
- Click the Save button (diskette icon) in the lower right corner.
Custom SVG Icon
Materia X2 uses SVG icons with a Material Design theme. There are several advantages of Icon SVG, including scalability, SEO friendly, editing ability, and independent resolution. Therefore, the future of SVG will look bright and the trend of using SVG will continue to increase.
In addition to using the Default Icon, you can also change all the icons in Materia X2.
More documentation will be explained separately in the Configuring Custom Icons and Icon Packs.
Default Fonts
This feature is useful for changing the Font on the Materia X2 Theme. There are several default Blogger fonts that you can use. However, we have also converted some of those built-in Fonts to Optional Fonts. These font conversions include:
- Allerta - Converted to Inter Font.
- Allerta Stencil - Converted to Google Sans Font.
- Arima - Converted to Google Sans Text Font.
- Arvo - Converted to Rubik's Font.
- Bentham - Converted to Tajawal Font (Arabic).
- Poppins - Converted to Calibri Font.
- Play - Converted to Urbanist Font.
- Cardo - Converted to Jost Font.
Here are some steps to change the font in the Materia X2 Theme:
- Go to Blogger Dashboard, select the Theme menu.
- Click the CUSTOMIZE button.
- Click Advanced Dropdown, click Default Options Dropdown.
- Look for the Option named Default Fonts, click Default Dropdown and select the font you want to use.
- Click the Save button (diskette icon) in the lower right corner.
FAB Corner Radius
This setting is useful for setting the rounded corner radius for the Floating Action Button on both Index Pages and Item page. If you want to customize it, you can follow these steps:
- Go to Blogger Dashboard, select the Theme menu.
- Click the CUSTOMIZE button.
- Click Advanced Dropdown, click Default Options Dropdown.
- Look for the Option named FAB Corner Radius>, drag the slider right or left until you find the corner radius you want.
- Click the Save button (diskette icon) in the lower right corner.
FAB Bottom Spacing
This setting is useful for setting the bottom spacing for the Floating Action Button on both Index Pages and Item page. If you want to customize it, you can follow these steps:
- Go to Blogger Dashboard, select the Theme menu.
- Click the CUSTOMIZE button.
- Click Advanced Dropdown, click Default Options Dropdown.
- Look for the Option named FAB Bottom Spacing, drag the slider right or left until you find the bottom spacing you want.
- Click the Save button (diskette icon) in the lower right corner.
FAB Left/Right Spacing
This setting is useful for setting the left (Right for LTR mode) or right (Left for RTL mode) spacing for the Floating Action Button on both Index Pages and Item page. If you want to customize it, you can follow these steps:
- Go to Blogger Dashboard, select the Theme menu.
- Click the CUSTOMIZE button.
- Click Advanced Dropdown, click Default Options Dropdown.
- Look for the Option named FAB Left/Right Spacing, drag the slider right or left until you find the bottom spacing you want.
- Click the Save button (diskette icon) in the lower right corner.
- This feature is only available on Materia X2 version 3.7 and above.
- This setting is only useful if you set the Posts FAB Position (Index Page) and Post FAB Position (Item Page) to 1px Left or 3px Right.
FAB Position
This setting is useful for changing the position of the Floating Action Button (FAB). If you want to customize it, you can follow these steps:
- Go to Blogger Dashboard, select the Theme menu.
- Click the CUSTOMIZE button.
- Click Advanced Dropdown, click Default Options Dropdown.
- Look for the Slider setting named FAB Position (Left | Right), drag the slider right or left. Here is the explanation:
- 1px: Left - To set the FAB position to the left.
- 2px: Right - To set the FAB position to the right.
- Click the Save button (diskette icon) in the lower right corner.
FAB Post
This setting is useful for combining or separating Floating Action Button (FAB) buttons on global pages and post pages. If you want to customize it, you can follow these steps:
- Go to Blogger Dashboard, select the Theme menu.
- Click the CUSTOMIZE button.
- Click Advanced Dropdown, click Default Options Dropdown.
- Look for the Slider setting named FAB Post (Combined | Separated), drag the slider right or left. Here is the explanation:
- 1px: Combined - To combine FAB buttons.
- 2px: Separated - To separate FAB buttons.
- Click the Save button (diskette icon) in the lower right corner.
Browser Tab/Appbar Color and Key Color
This setting is useful for changing the Key color in the Materia X2 Theme. A key color is the primary color for the tab or app bar on a web browser (usually a web browser app on a mobile device) as well as the primary color (the default color) for a specific element or component.
Here are some steps to customize it:
- Go to Blogger Dashboard, select the Theme menu.
- Click the CUSTOMIZE button.
- Click Advanced Dropdown, click Default Options Dropdown.
- Find a Default Key Color setting and select the color you want to change.
- Click the Save button (diskette icon) in the lower right corner.
Advanced Settings
All the documentation we created to customize the Materia X2 Theme, about 98% you don't need to touch the code at all. But this time, you are required to touch the code via Edit HTML if you want to add a certain Meta Tag (Custom Meta Tag).
Meta Tags: Open Graph and Main Image
Follow these steps if you want to add Open Graph and Main Image meta tag (image_src meta tag):
- Go to the Edit HTML page and look for the
YOUR_IMAGE_URLcode - Change the code to your Image URL.
Note that this setting is only useful on the Index (Multiple Items) page.
Meta Tag: Google Site Verification
Google Site Verification meta tag is used to verify ownership of a website with Google Search Console.
Follow these steps if you want to add Google Site Verification meta tag (google-site-verification meta tag):
- Go to the Edit HTML page and look for the
YOUR_GOOGLE_SITE_VERIFICATIONcode - Change the code to your Google Site Verification code.
Further explanation can be seen on the Verify your site ownership - Search Console Help page.
Meta Tag: Bing Webmaster Ownership
Bing Webmaster Ownership meta tag is used to verify ownership of a website with Microsoft Bing Webmaster Tools.
Follow these steps if you want to add Bing Webmaster Ownership meta tag (msvalidate.01 meta tag):
- Go to the Edit HTML page and look for the
YOUR_BING_SITE_VERIFICATIONcode - Change the code to your Bing Webmaster Ownership code.
Further explanation can be seen on the Add and Verify site - Bing Webmaster Tools page.
Meta Tag: DMCA Site Verification
DMCA Site Verification meta tag is used to verify ownership of a website with the Digital Millennium Copyright Act (DMCA) service provider.
Follow these steps if you want to add DMCA Site Verification meta tag (dmca-site-verification meta tag):
- Go to the Edit HTML page and look for the
YOUR_DMCA_SITE_VERIFICATIONcode - Change the code to your DMCA Site Verification code.
Further explanation can be seen on the What Does it Mean if My Badge is Non-Verified? page.
Meta Tag: Pinterest Domain Verification
Pinterest Domain Verification meta tag is used to verify ownership of a website with Pinterest.
Follow these steps if you want to add Pinterest Domain Verification meta tag (p:domain_verify meta tag):
- Go to the Edit HTML page and look for the
YOUR_PINTEREST_SITE_VERIFICATIONcode - Change the code to your Pinterest Domain Verification code.
Further explanation can be seen on the Claim your website - Pinterest page.
Meta Tag: Facebook Profile ID
Facebook Profile ID meta tag is used to associate a Facebook Page with a website. When a user shares a link to your website on Facebook, the meta tag tells Facebook which Page to use as the source of the content.
Follow these steps if you want to add Facebook Profile ID meta tag (fb:profile_id meta tag):
- Go to the Edit HTML page and look for the
YOUR_FACEBOOK_PROFILE_IDcode - Change the code to your Facebook Profile ID code.
Further explanation can be seen on the How usernames and user IDs are used on Facebook Profiles page.
Meta Tag: Facebook Pages
Facebook Pages meta tag is used to verify ownership of a website with Facebook Business Manager. Facebook Business Manager is a tool that allows businesses to manage their Facebook Pages, ad accounts, and other assets in one place.
Follow these steps if you want to add Facebook Pages meta tag (fb:pages meta tag):
- Go to the Edit HTML page and look for the
YOUR_FACEBOOK_PAGE_IDcode - Change the code to your Facebook Pages code.
Further explanation can be seen on the Find your Facebook Page ID page.
Meta Tag: Facebook App ID
Facebook App ID meta tag is used to associate a Facebook App with a website. The meta tag is used to tell Facebook which App to use when a user interacts with content on your website, such as liking or sharing a page.
Follow these steps if you want to add Facebook App ID meta tag (fb:app_id meta tag):
- Go to the Edit HTML page and look for the
YOUR_FACEBOOK_APP_IDcode - Change the code to your Facebook App ID code.
Custom Meta Tags
Here we will not explain more about Custom Meta Tags, because we are sure you already understand them.
If you want to add Custom Meta Tags, then we have provided a location to place them. Place your Custom Meta Tags just below the following code:
<b:comment>Put your Custom Meta Tag below</b:comment>Those are some steps to configure the Default Options in Materia X2 Theme. If you have any questions, please write them in the comments section.
If you want to report some bugs, you can write them in the comments section on the Bug Report page and if you want to request new features or want to provide feedback, please write them in the comments section on the Request and Feedback page.
[image] image_url [/image]
To add a code block:
[code] your_code [/code]
To add a quote:
[quote] your_quote [/quote]
To add a link:
[link] your_link_text | link_url [/link]